Automate II
We give you full support
MICRO-AREA X-RAY RESIDUAL STRESS MEASUREMENT SYSTEM
Highly accurate micro area residual stress with both iso- and side-inclination methods.


Features
- Large and heavy samples are measured with high accuracy by utilizing a highly accurate goniometer.
- Automatic mapping measurements with teaching function.
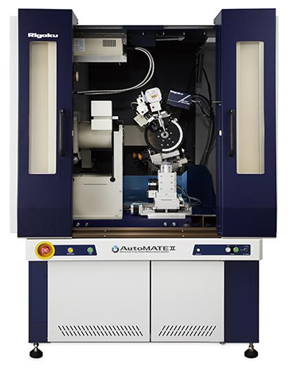
- An X-ray radiation enclosure with interlock system automatically locks the enclosure door when the X-ray shutter is open.
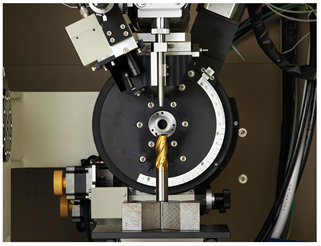
- The measurement position is adjusted by a CCD camera equipped with a microscope having a zoom function.
- The two-axis goniometer system allows for both iso-inclination and side-inclination methods automatically without readjustment of the sample position.
Overview
Residual stress may be created during the manufacturing process of a material, or it may accumulate in a structure over many years in operation. In either case, this stress can have a serious negative effect on a product’s quality, durability and lifetime. Accurate detection of residual stress is an important element of the quality control process and helps predict the service lifetime of products.
X-ray diffraction (XRD) for stress analysis of large/heavy samples
Large and heavy parts can be measured with high accuracy. This is possible because the X-ray source and detector arm are mounted on a highly accurate two-axis goniometer that can position them relative to the measurement site and perform scans with an accuracy of 0.1 microns when using the automated XYZ stage.
World's most advanced residual stress measurement system
Large and heavy samples are measured by AutoMATE II with high accuracy by utilizing a 2-axis goniometer with a stationary sample stage. The working volume for a sample is 720 mm (W) × 560 mm (D) × 540 mm (H) and the maximum sample weight is 30 kg. An optional sample stage can hold 20 kg and is equipped with an automatic XYZ stage with X, Y translations of -50 ≤ X, Y ≤ 50 mm and a Z translation of -5 ≤ Z ≤ 35 mm.
Advanced D/teX Ultra 1000 silicon strip detector technology
The detector used in the AutoMATE II is the D/teX Ultra1000, an electronic Si strip detector that has high dynamic range, high sensitivity, and good energy resolution, as well as not requiring any consumable gas.
Specifications Table
Product name | AutoMATE II |
Technique | X-ray diffraction (XRD) |
Benefit | Residual stress measurement on large and/or heavy objects by XRD |
Technology | Specialty 2-axis X-ray diffractometer with mapping capability |
Core attributes | 3 kW sealed X-ray tube, D/teX Ultra 1000 silicon strip detector |
Core options | Automated XYZ stage, CCD microscope with zoom function |
Computer | External PC, MS Windows OS, AutoMATE II for Windows |
